1. Introduction
Italian regulation requires that all inverters connected to the grid first perform an SPI self-test. During this self-test, the inverter checks the trip times for over voltage, under voltage, over frequency and under frequency – to ensure that the inverter disconnects when required. The inverter does this by changing the trip values; for over voltage/frequency, the value is decreased and for under voltage/frequency, the value is increased. The inverter disconnects from the grid as soon as the trip value is equal to the measured value. The trip time is recorded to verify that the inverter disconnected within the required time. After the self-test has been completed, the inverter automatically begins grid monitoring for the required GMT (grid monitoring time) and then connects to the grid.
Renac power On-Grid inverters are compatible with this self-test function. This document describes how to run the self-test using “Solar Admin” application and using the inverter display.

- To run the self-test using the inverter display, see Running the Self-Test using the Inverter Display on page 2.
- To run the self-test using “Solar Admin”, see Running the Self-Test using “Solar Admin” on page 4.
2. Running the Self-Test through the Inverter Display
This section details how to perform the self-test using the inverter display. Photos of the display, showing the inverter serial number and the test results can be taken and submitted to the grid operator.
To use this feature, the inverter communication board firmware (CPU) must be below version or higher.
To perform the self-test through the inverter display:
- Ensure that the inverter country is set to one of the Italy country settings; the country setting can be viewed in the inverter main menu:
- To change the country setting, select SafetyCountry â CEI 0-21.

3. From the inverter main menu, select Setting â Auto Test-Italy, long press Auto Test-Italy to perform the test.

If all tests have passed, the following screen for each testing appears for 15-20 seconds. When the screen shows “Test end”, the “Self-Test” is done.
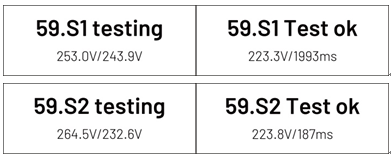
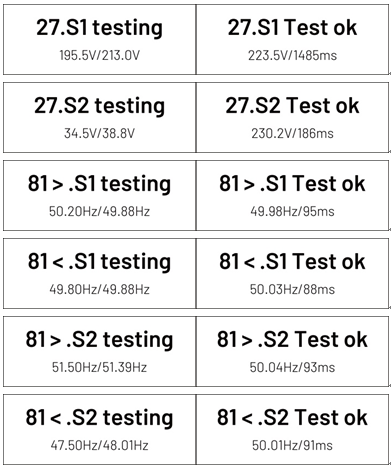
4. After the testing done, tests results can be viewed by pressing function button (press the function button less than 1s).
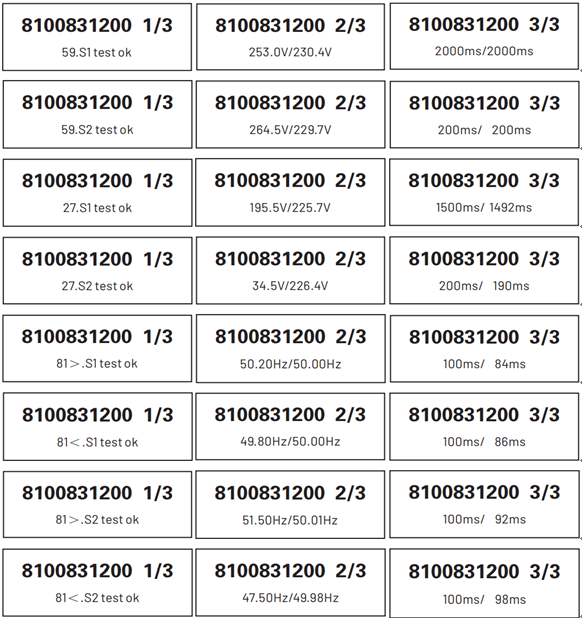
If all tests have passed, the inverter will begin grid monitoring for the required time and connect to the grid.
If one of the tests failed, the faulty message “test fail” will appear on screen.
5. If a test failed or is aborted, it can be repeated.
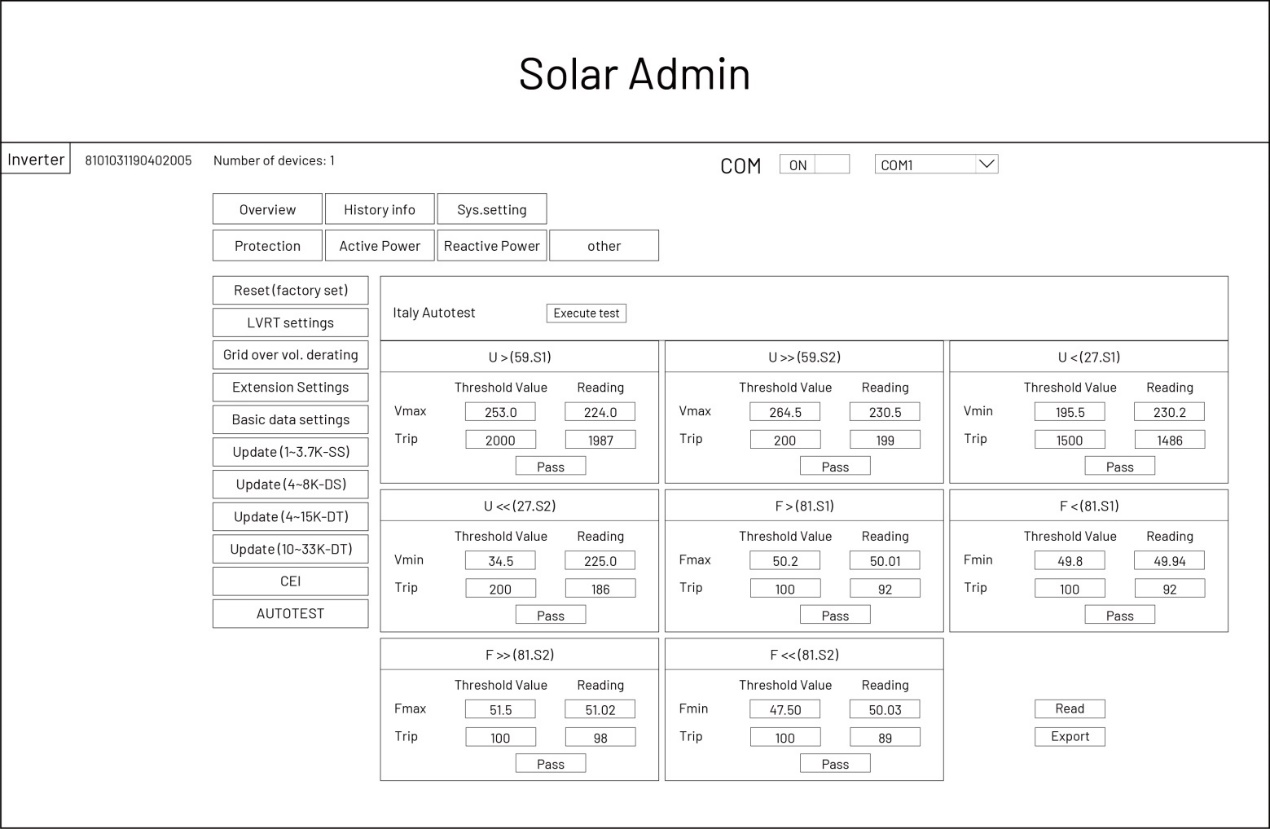
3. Running the Self-Test through the “Solar Admin”.
This section details how to perform the self-test using the inverter display. After the self-test done, the user can download the test report.
To perform the self-test through the “Solar Admin” application:
- Download and install “Solar Admin” on laptop.
- Connect inverter to laptop via RS485 cable.
- When the inverter and “solar admin” are successfully communicated. Click “Sys.setting”-“Other”-“AUTOTEST” enter into “Auto-Test” interface.
- Click “Execute” to start the testing.
- The inverter will automatically run the test until the screen shows “Test end”.
- Click “Read” to read the test value, and click “Export” to export the test report.
- After click “Read” button, interface will show the test results, if the test passes, it will show “PASS”, if the test is failed, it will show “FAIL”.
- If a test failed or is aborted, it can be repeated.